Codes
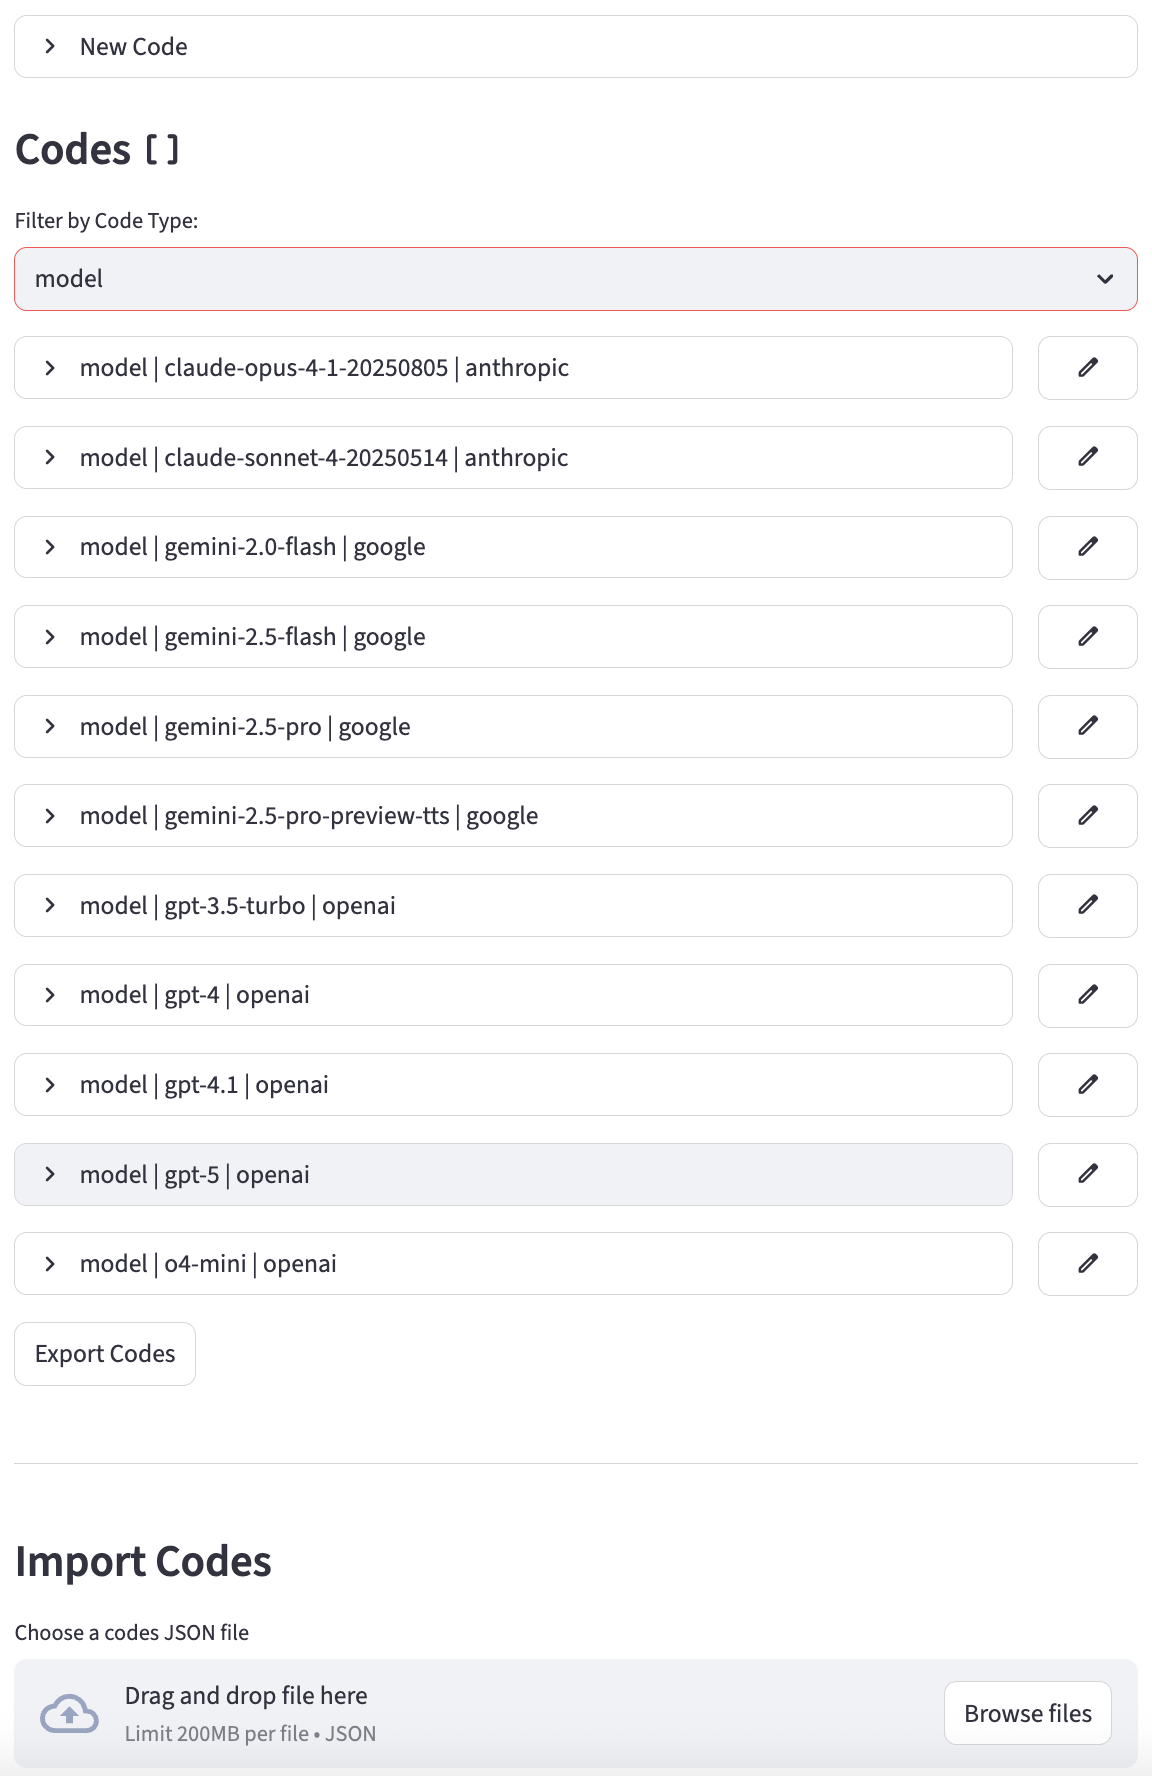
The Codes page in the application allows users to define and manage various types of codes or enumerated values. These codes can be used throughout the system for categorizing data, populating selectbox options, or defining specific behaviors (e.g., action types, MIME types, model providers).
Overview
The page provides functionalities to:
- Add new codes.
- List existing codes, with an option to filter by
Code Type. - Edit existing codes.
- Delete codes.

Adding a New Code
To add a new code:
- Navigate to the Codes page.
- Expand the "New Code" section.
- A form will appear with the following fields:
- Code Type: (Text Input) A category for the code (e.g., "action_type", "model", "fileMimeType"). This helps in grouping and filtering codes.
- Code Name: (Text Input) The actual name or identifier of the code (e.g., "twilio_call", "gemini-1.5-pro-latest", "image/jpeg").
- Code Value: (Text Input) An optional value associated with the code name. This could be the same as the name or a different representation.
- Code Filter (Optional): (Text Input) An optional filter string that can be used to further categorize or select codes, often used in conjunction with
Code Type(e.g., a model provider name like "Google" whenCode Typeis "model"). - Code Sort (Optional): (Number Input) An optional integer value used for sorting codes within their type or filter group. Default is
0.
- Click the "Create Code" button.
- Upon submission, the system stores the new code configuration.
Listing Codes
Existing codes are listed under the "Codes" subheader.
- Filtering: You can filter the list of codes by
Code Typeusing the selectbox above the list. The options in the selectbox are dynamically populated with uniqueCode Typevalues present in the database for the current account. Selecting "All" shows all codes. - Display: Each code is shown in an expandable section, displaying its
Code Type,Code Name, andCode Filter. - Details: Expanding a code's section reveals:
- Code Type
- Code Name
- Code Value
- Code Filter
- Code Sort
- Each code entry has "Edit" and "Delete" buttons.
Editing a Code
To edit an existing code:
- Click the "Edit" button next to the desired code in the list.
- The "Edit [Code Name]" form will appear, pre-filled with the code's current information.
- All fields from the "Add Code" form are available for modification:
- Code Type
- Code Name
- Code Value
- Code Filter
- Code Sort
- Click "Save Changes" to update the code or "Cancel" to discard changes and hide the edit form.
Deleting a Code
To delete a code:
- Click the "Delete" button next to the desired code in the list.
- Confirm the deletion when prompted (though the code doesn't explicitly show a confirmation dialog, it's standard practice). The code will be permanently removed from the database.
Exporting Codes
The page includes an "Export Codes" button, which allows you to download all codes associated with the currently selected account.
- Click the "Export Codes" button.
- A JSON file containing all the codes for the account will be generated.
- Your browser will download this file, typically named
codes_export.json.
This file can serve as a backup or be used to import the codes into another account.
Importing Codes
The import functionality allows you to upload a JSON file (generated by the export feature) to add or update codes in the selected account.
- Use the "Import Codes" file uploader to select the
codes_export.jsonfile from your computer. - The system will process the file and add the codes to the current account.
- A summary of the import process, indicating how many codes were successfully added, will be displayed.
Use Case: Preparing for Agent Version Import
When you plan to move an agent configuration from a source account to a target account using the Import page, it is crucial that the target account has all the necessary underlying codes that the agent's configuration depends on (e.g., action_type codes, model names, etc.).
The recommended workflow to ensure a smooth agent import is:
- In the source account, navigate to the Codes page and use the Export Codes button to download the configuration.
- Switch to the target account.
- On the Codes page in the target account, use the Import Codes feature to upload the file you just exported.
- Once the codes are imported, you can proceed to the Import page to import the agent version.
This two-step process ensures that all dependencies are in place, preventing potential errors and ensuring the imported agent functions correctly in its new environment.