Agents
The Agents page in the admin interface allows for the creation, configuration, and management of AI Agents. These agents are the core AI bots that interact with users, process information, and perform actions based on their defined intents and prompts.
Permissions
Access to the Agents page and its functionalities is typically controlled by user permissions. Users with owner, admin, editor, or agent_edit permissions can generally manage agents.

Adding a New Agent
To create a new AI Agent:
- Navigate to the Agents page.
- Ensure an account is selected, as agents are associated with an account.
- Expand the "New Agent" section.
- A form will appear with the following fields:
- Agent Name: A descriptive name for the agent.
- Agent Status: A toggle to set the agent as active (default) or inactive.
- Agent Title: The title that will appear in the customer-facing AI interface.
- Agent Subtitle: A subtitle that will appear in the customer-facing AI interface.
- Agent Description: A description used in prompts to help focus the agent on its topic or purpose.
- Accent Color: Selects an accent color for the customer AI interface (e.g., blue, green).
- Start Statement: The initial welcome message displayed in the customer AI interface.
- User Image Path: Path to the image representing the user in the chat interface.
- Assistant Image Path: Path to the image representing the AI agent in the chat interface.
- Start Prompt: A dropdown to select the agent's initial classification prompt from a list of available prompts for the selected account.
- Default Intent: A dropdown to select the intent to use if no other intent is matched (typically a "no match" or "fallback" intent).
- Allow Transfer: A toggle to enable or disable the agent's ability to transfer to a live agent/human.
- Transfer Passkey: A toggle to enable or disable the use of a passkey during transfers for validation.
- Transfer Types: A multi-select field to choose allowed transfer methods (e.g., "chat", "callback", "voice").
- Transfer Phone: The phone number to display for call-in or transfer options.
- Upon submission:
- A unique UID is automatically generated for the new agent.
- The agent details are saved to the database, linked to the selected
account.
- Click the "Create Agent" button.
Listing and Selecting Agents
Existing agents for the currently selected account are displayed in a list:
- Each agent is shown in an expandable section.
- The currently selected agent is highlighted with a ":star: SELECTED AGENT" prefix.
- The display includes the agent name and a status icon (active/inactive).
- Expanding an agent's section reveals detailed information:
- UID
- Title, Subtitle, Description
- Accent Color, Start Statement
- Image Paths (User and Assistant)
- Start Prompt, Default Intent
- Transfer settings (Allow Transfer, Passkey, Types, Phone)
- Each agent entry has the following action buttons:
- Select: Makes this agent the currently active one in the session, so that this agent's information is shown in the other menus. This action also updates the user's last selected agent.
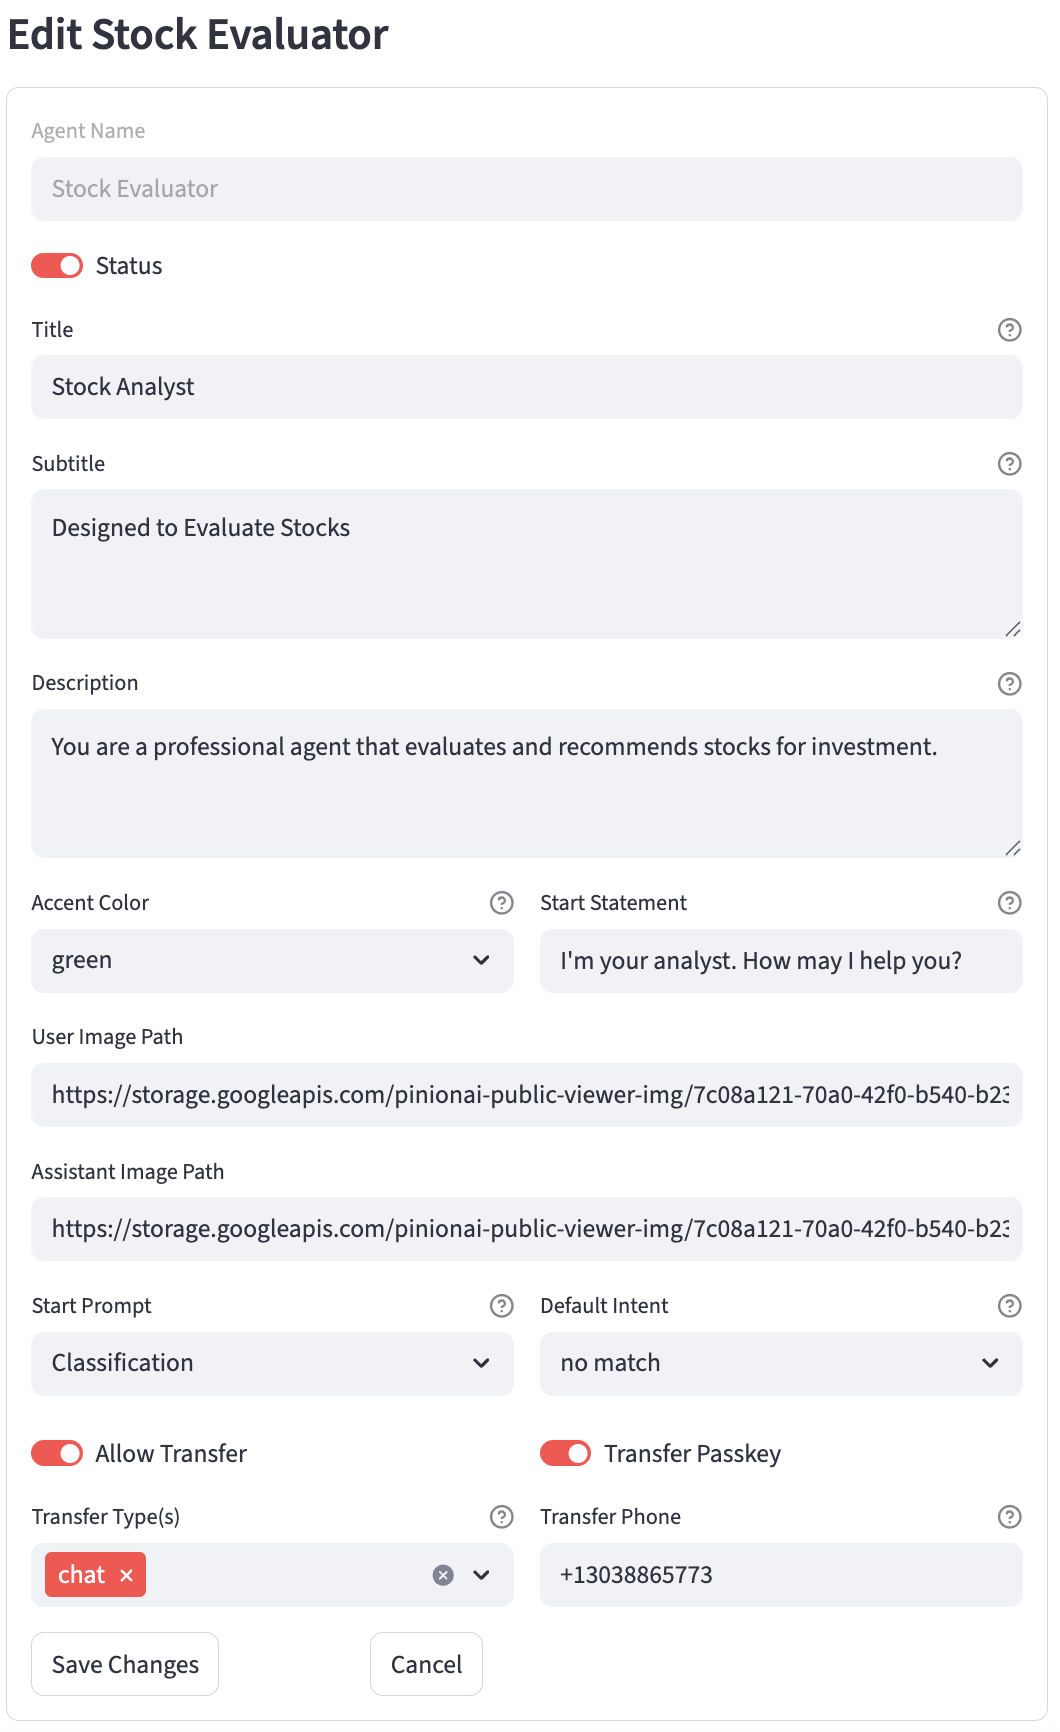
- Edit: Opens the "Edit Agent" form for this agent and selects it.
- Delete: Removes the agent and associated data (see Deleting an Agent).
Editing an Existing Agent
To modify an existing agent:
- Click the "Edit" button next to the desired agent in the list. This will also select the agent.
- The "Edit Agent" form will appear, pre-filled with the agent's current information.
- Most fields available during agent creation can be modified, including:
- Status, Title, Subtitle, Description
- Accent Color, Start Statement
- Image Paths
- Start Prompt, Default Intent
- Transfer settings
- The Agent Name and UID are typically displayed but not directly editable in this form.
- Buttons available within the edit form:
- Save Changes: Saves the modifications to the database.
- Cancel: Discards changes and closes the edit form.
Deleting an Agent
To delete an agent:
- Click the "Delete" button next to the desired agent in the list.
- The system will attempt to:
- Retrieve the agent's UID and name.
- Delete associated sessions linked to this agent's UID.
- Remove this agent's name from the
prompt_agentsarray in all associated prompts. - Remove this agent's name from the
intent_agentsarray in all associated intents. - Remove this agent's name from the
variable_agentsarray in all associated variables. - Finally, delete the agent record itself from the database.
- A success or error message will be displayed. Changes are rolled back on error.
Session Management
- The page requires a user to be logged in.
- The
Selected Accountis used to filter agents by account. - The
Selected Agentdetermines the currently active agent context and populates other menu options, like variables, intents, prompts, etc... - Selecting an agent records this agent as the user's
last_agentfor persistence for next login.