APIs
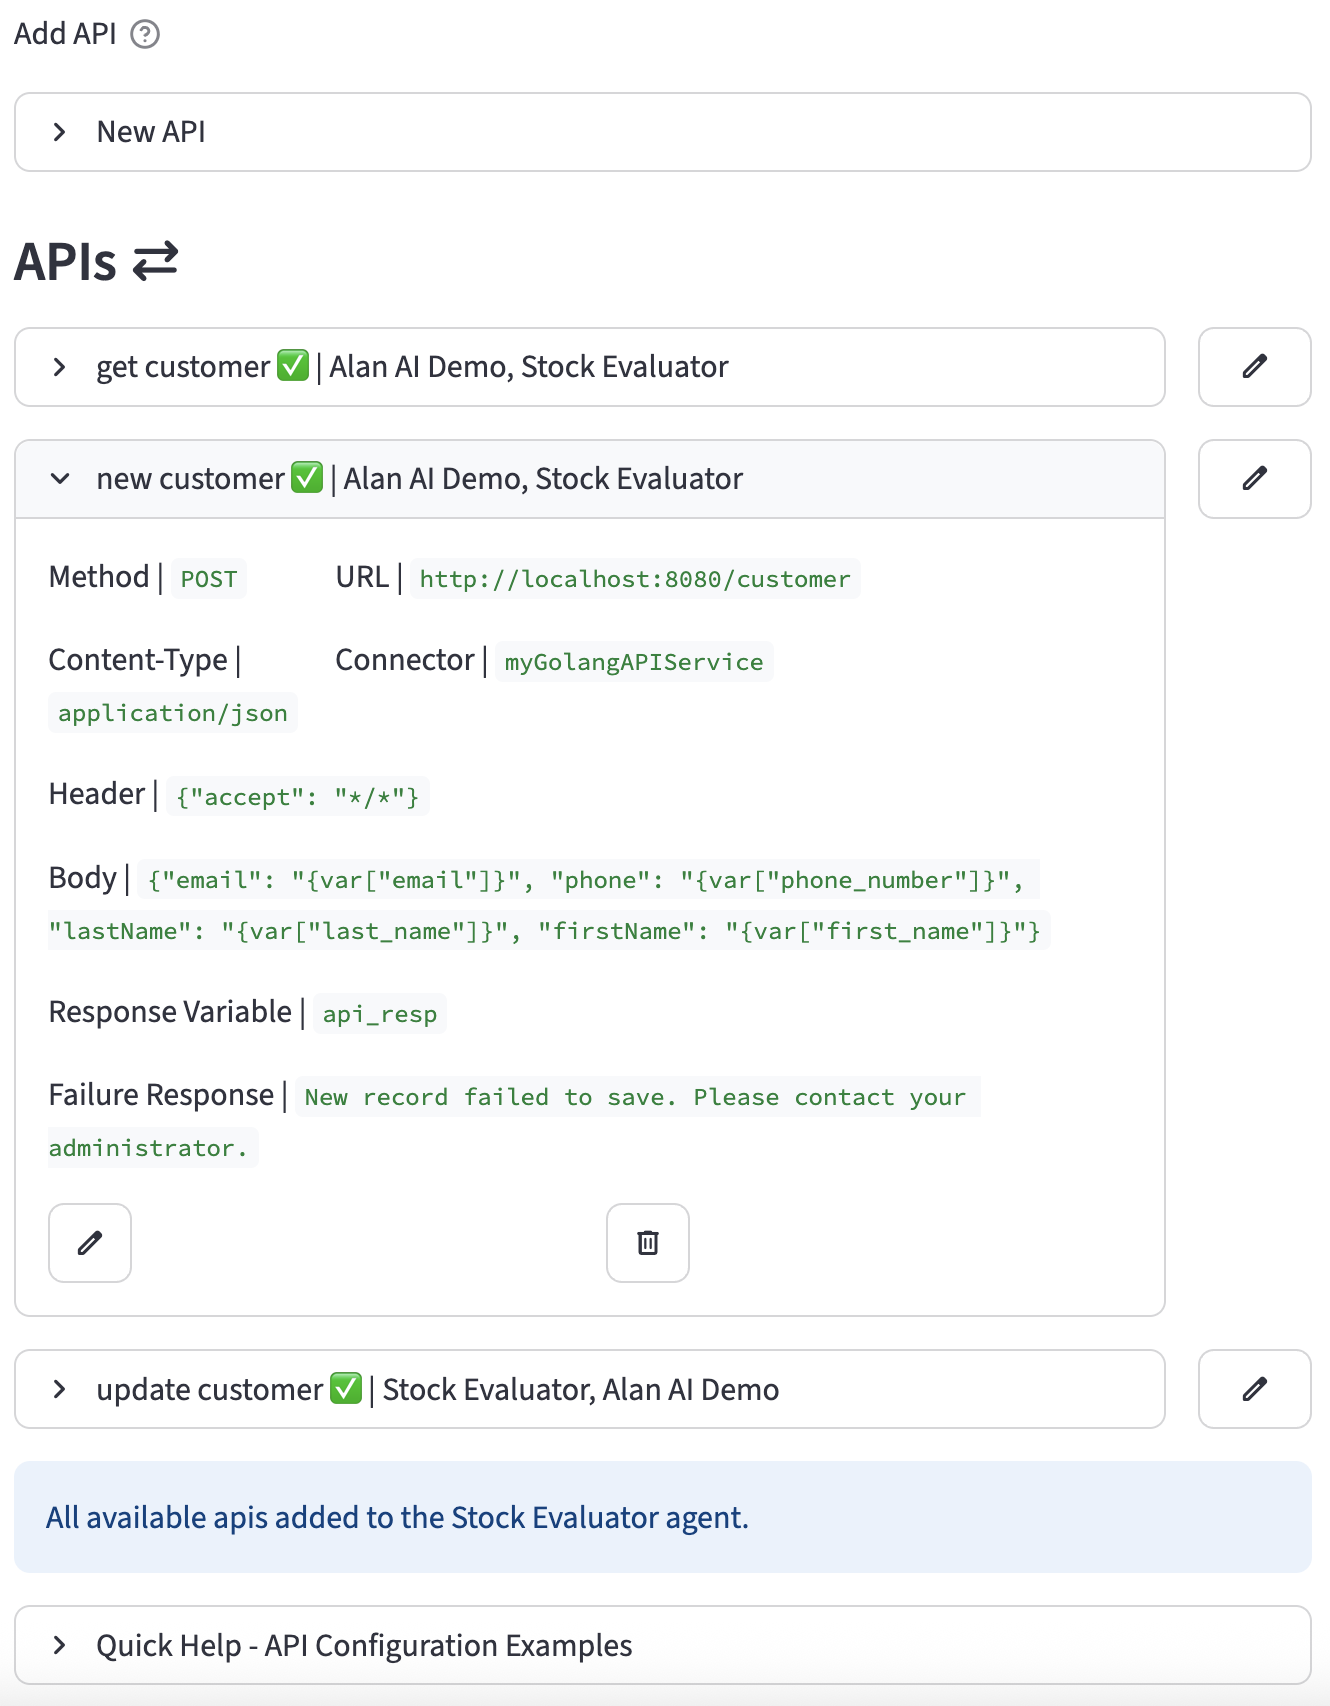
The APIs page allows you to configure and manage connections to external RESTful APIs. These can be used by your agents to fetch data, send information, or trigger actions in other systems as part of an intent or action flow.
Prerequisites
Before you can manage APIs, ensure the following conditions are met:
- You must be logged into the application.
- Your user role must have the necessary permissions (
owner,admin,editor, orapis). - You must have an Account selected from the sidebar.
- You must have an Agent selected from the sidebar. APIs are managed on a per-agent basis.
Page Overview
The page provides functionalities to:
- Add new API configurations.
- List existing APIs, filtered by the selected agent.
- Edit existing API configurations.
- Associate APIs with specific agents.
- Delete APIs.

Creating a New API
To create a new API configuration, click on the "New API" expander to reveal the creation form.
Helper Buttons
- Add Variable: Opens a dialog to create a new variable that can be used within your API configurations (e.g., for URLs, headers, or bodies).
- Lookup Names: Opens a dialog to look up the exact names of Prompts, Connectors, and Variables available for the selected agent.
Configuration Fields
Here is a breakdown of the fields in the "New API" form:
- Name: A unique, descriptive name for the API call. This is how it will be referenced in intent and action flows.
- Status: A toggle to enable (
True) or disable (False) this API configuration. - Agent(s): A multi-select dropdown to associate this API with one or more agents.
- Method: The HTTP method for the request (e.g.,
GET,POST,PUT,DELETE). - URL: The endpoint URL for the API. You can embed variables to make the URL dynamic, for example:
https://api.example.com/users/{var["user_id"]}. - Content-Type: The format of the data being sent in the request body. Common options are
application/jsonandapplication/x-www-form-urlencoded. - Connector: An optional Connector to use for authenticating the request. This is typically used for services that require OAuth 2.0, where the connector handles obtaining and refreshing the bearer token.
- Header (JSON): A JSON object of HTTP headers to include in the request. You can embed variables here as well.
- Body: The payload for
POSTorPUTrequests. This can be a JSON object or plain text. Variables can be embedded here to send dynamic data. - Result Variable: The name of a session variable where the response from the API will be stored. The entire response body (as text or a parsed JSON object) will be placed in this variable.
- API Failure Response Message: An optional, user-friendly message to display if the API call fails (e.g., returns a 4xx or 5xx status code). This allows for graceful error handling in the conversation.
Once all fields are configured, click Create API.
Managing Existing APIs
Below the "Add API" section, all APIs associated with the currently selected agent are listed.
- Each API is displayed in its own expander, showing its name, status, and associated agents in the title.
- Expanding an API reveals all of its configured details.
- On the right of each API's title bar, you will find two icons:
- :material/edit: Edit: Click this to open the edit form for that API.
- :material/delete: Delete: Click this to permanently delete the API configuration. A confirmation will be required.
Editing an API
Clicking the Edit icon opens a form identical to the "Add API" form, but pre-populated with the selected API's data. You can modify any field and then click Save Changes to update the API or Cancel to discard your changes.
Assigning an API to an Agent
At the bottom of the page, you may see a form titled "Assign existing API to '[agent_name]':".
- This tool is for associating an API that already exists in your account but is not yet assigned to the currently selected agent.
- The dropdown lists all such available APIs.
- Select an API from the list and click Assign API to link it to the current agent.
Configuration Examples
Example 1: GET Request to Fetch a Customer Record
This API fetches a customer's data using an email address stored in a variable.
- Name:
get_weather - Method:
GET - URL:
http://localhost:8080/customer/{var["email"]} - Connector:
myGolangAPIService - Result Variable:
customer - API Failure Response Message:
Sorry, your customer record was not located. Please sign up or contact your administrator.
Example 2: POST Request to Create a New Customer
This API creates a new user in an external system using data collected during the conversation.
- Name:
new_customer - Method:
POST - URL:
http://localhost:8080/customer - Content-Type:
application/json - Connector:
myGolangAPIService - Result Variable:
api_resp - API Failure Response Message:
New record failed to save. Please contact your administrator. - Body:
- Result Variable:
new_user_creation_status - API Failure Response Message:
I'm sorry, I was unable to create the user account at this time. Please try again later.
Example 3: POST Request to Update a Customer
This API updates an existing customer record using their unique ID and other session variables.
- Name:
update_customer - Method:
POST - URL:
http://localhost:8080/customer/{var["customer_uid"]} - Content-Type:
application/json - Connector:
myGolangAPIService - Body:
{
  "customerFirst": "{var['first_name']}",
  "customerLast": "{var['last_name']}",
  "customerEmail": "{var['email']}",
  "customerPhone": "{var['phone_number']}",
  "customerConfig": {},
  "customerData": { "full_name": "{var['full_name']}" }
}
- Result Variable:
update_resp - API Failure Response Message:
Failed to update customer.